Recently, I have been conducting a few experiments in my electric kiln to try and achieve reduction using lidded containers of clay known as saggars.
I had better preface this post with the warning that, should you try this, there is a risk of damaging your kiln elements due to the reduction gases. So be warned.
However, if the saggar is well sealed so the carbon gases are contained, I figured it is not likely to do any/much harm as an occasional test.
The premise of reduction, put very simply, is that carbon dioxide/monoxide in the kiln atmosphere will rip oxygen molecules from the glaze, thus changing the nature of the metal oxides within it. This will change the colour of the glazes. For example, iron oxide will produce greens or blues instead of tan to brown, while copper will go red/purple instead of green. It can also change the behaviour of a glaze, e.g. iron oxide will flux more in reduction, so watch out for the runs.
Normally one would achieve a reduction firing in a gas or wood kiln by limiting the flow of air through the kiln to produce an inefficient firing and encourage the formation of carbon gases. But it can be done with a saggar by placing combustible materials inside. Charcoal is what I used.
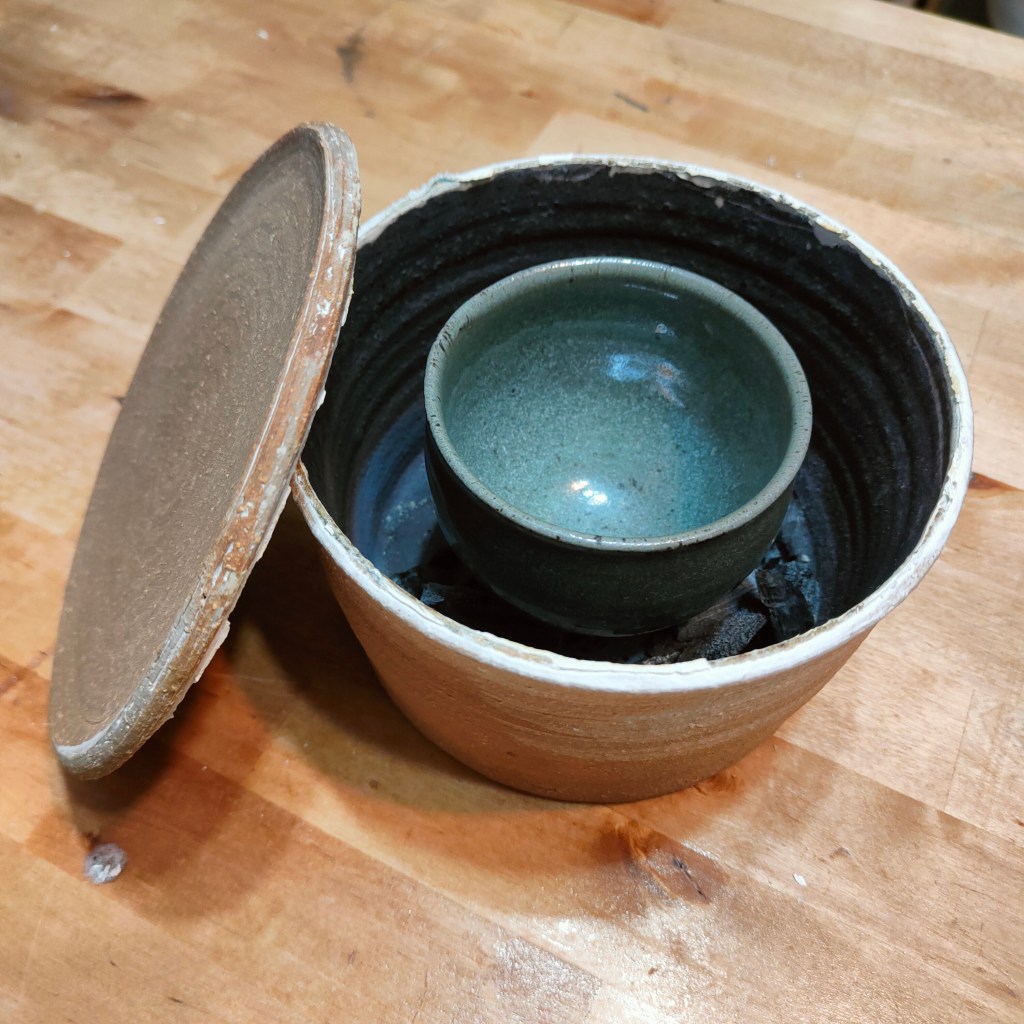
The saggar is simply a lidded clay container that is large enough to hold your glazed pottery with a little space all around. Saggars have been used in pottery for hundreds of years, normally to keep ashes off the wares.
For reduction, the saggar and lid must be sealed together to contain the carbon gases, both to reduce the glazes and to protect the electrical elements.
I have seen a couple of Japanese potters use the saggar method on YouTube and they used a clay ring to seal the lid. I have tried this and found the clay cracks and comes loose, so I do not believe it is a good seal. As an alternative, I tried batt wash – the refractory slip one uses to protect kiln shelves. It needs to be painted on thickish so that there is plenty to make a good seal. This worked a treat and didn’t crack. The lid still popped off very easily after the firing.
The whole process goes:
- Throw/construct and bisque fire the saggar and lid (think small casserole dish). Make it big enough to fit the pot(s) you intend to reduction fire, allowing for clay shrinkage. There is no need to make a gallery for the lid – it can just sit on the saggar body.
- Put small charcoal pieces in a ring around the bottom of the saggar body leaving space in the centre for your pot. I don’t think one needs too much. This will depend on how big your saggar is. On my first attempt the glazes came out very murky, I think from carbon trapping, so I likely used too much.
- (Optional) Drop in a stilt or clay cookie on which to stand the pot and lift it away from the charcoal and resulting ash. (Make sure your lid is still clear of the pot once it is raised.)
- Place your pot (glazed with a reduction glaze for the cone you will fire to) in the saggar sitting on the stilt/cookie. Make sure it is stable for when you carry it to the kiln.
- Daub some batt wash on the rim of the saggar, or edge of the lid, and stick the lid in place. It’s probably good to smear the wash that oozes out around the gap between lid and saggar to ensure a good seal. Let it dry out prior to firing.
- Carefully place the saggar in your kiln without tipping over the pot inside. I chose to place my saggar by the kiln exhaust vent so any fumes that might escape from the saggar would be first to leave.
- Fire to your chosen cone/temperature using your normal schedule.
- When cool, the lid should easily pop off revealing, hopefully, your lovely reduction fired piece.
I have tried this three times now, hence I feel I am something of an expert [rolls on floor laughing]. Not really, but I now have some idea of what works for me.
The first attempt did partially reduce but my glazes were muddy and the dark iron clay was very black. I think using white clays/porcelain and lighter iron clays only would be best. I believe, as mentioned above, that the muddiness was from putting in too much charcoal and getting carbon trapping.
It’s worth noting that the burning charcoal will kick off reduction earlier than one usually starts it, so there may be tendencies to get carbon trapping in some glazes and issues with dark iron clays. As per Wikipedia, brittle charcoal starts igniting at 700 degrees C (1300F) or so.
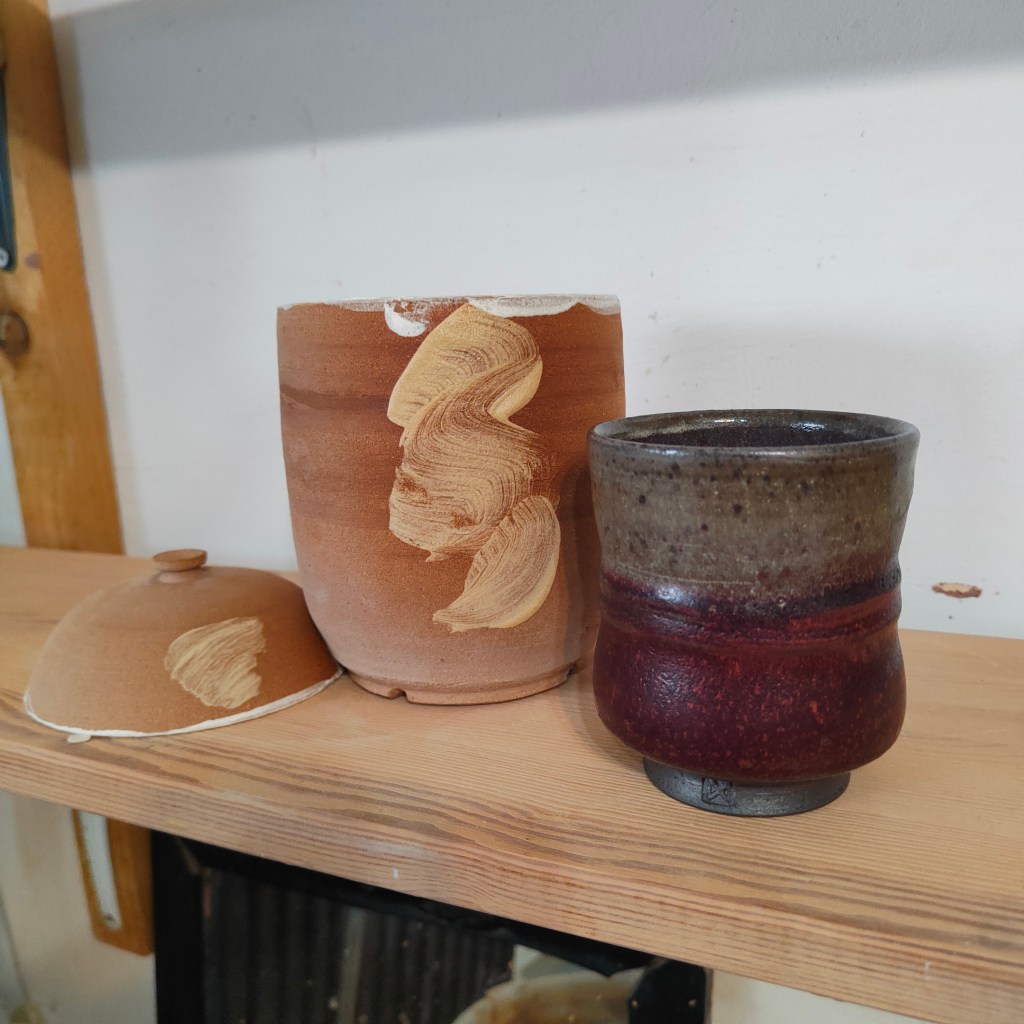
My second attempt reduced nicely, but I had messed up by glazing with an old, nearly empty tub of Selsor chun (with 1.5% red iron oxide). The SG was low, I didn’t check it, and I applied it too thinly when pouring over the exterior. It wasn’t a beautiful result, but it was promising. You can see the process here on YouTube.
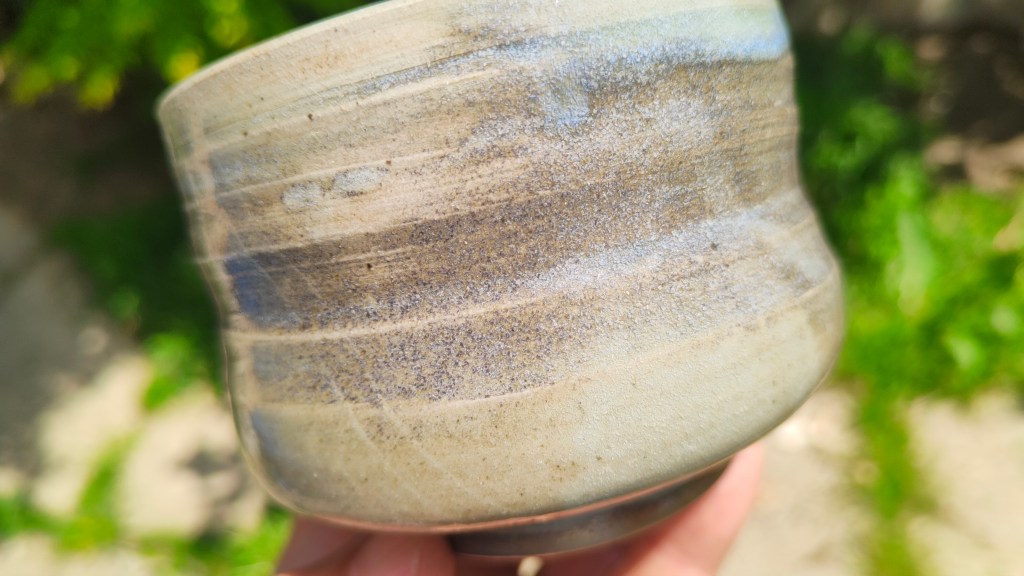
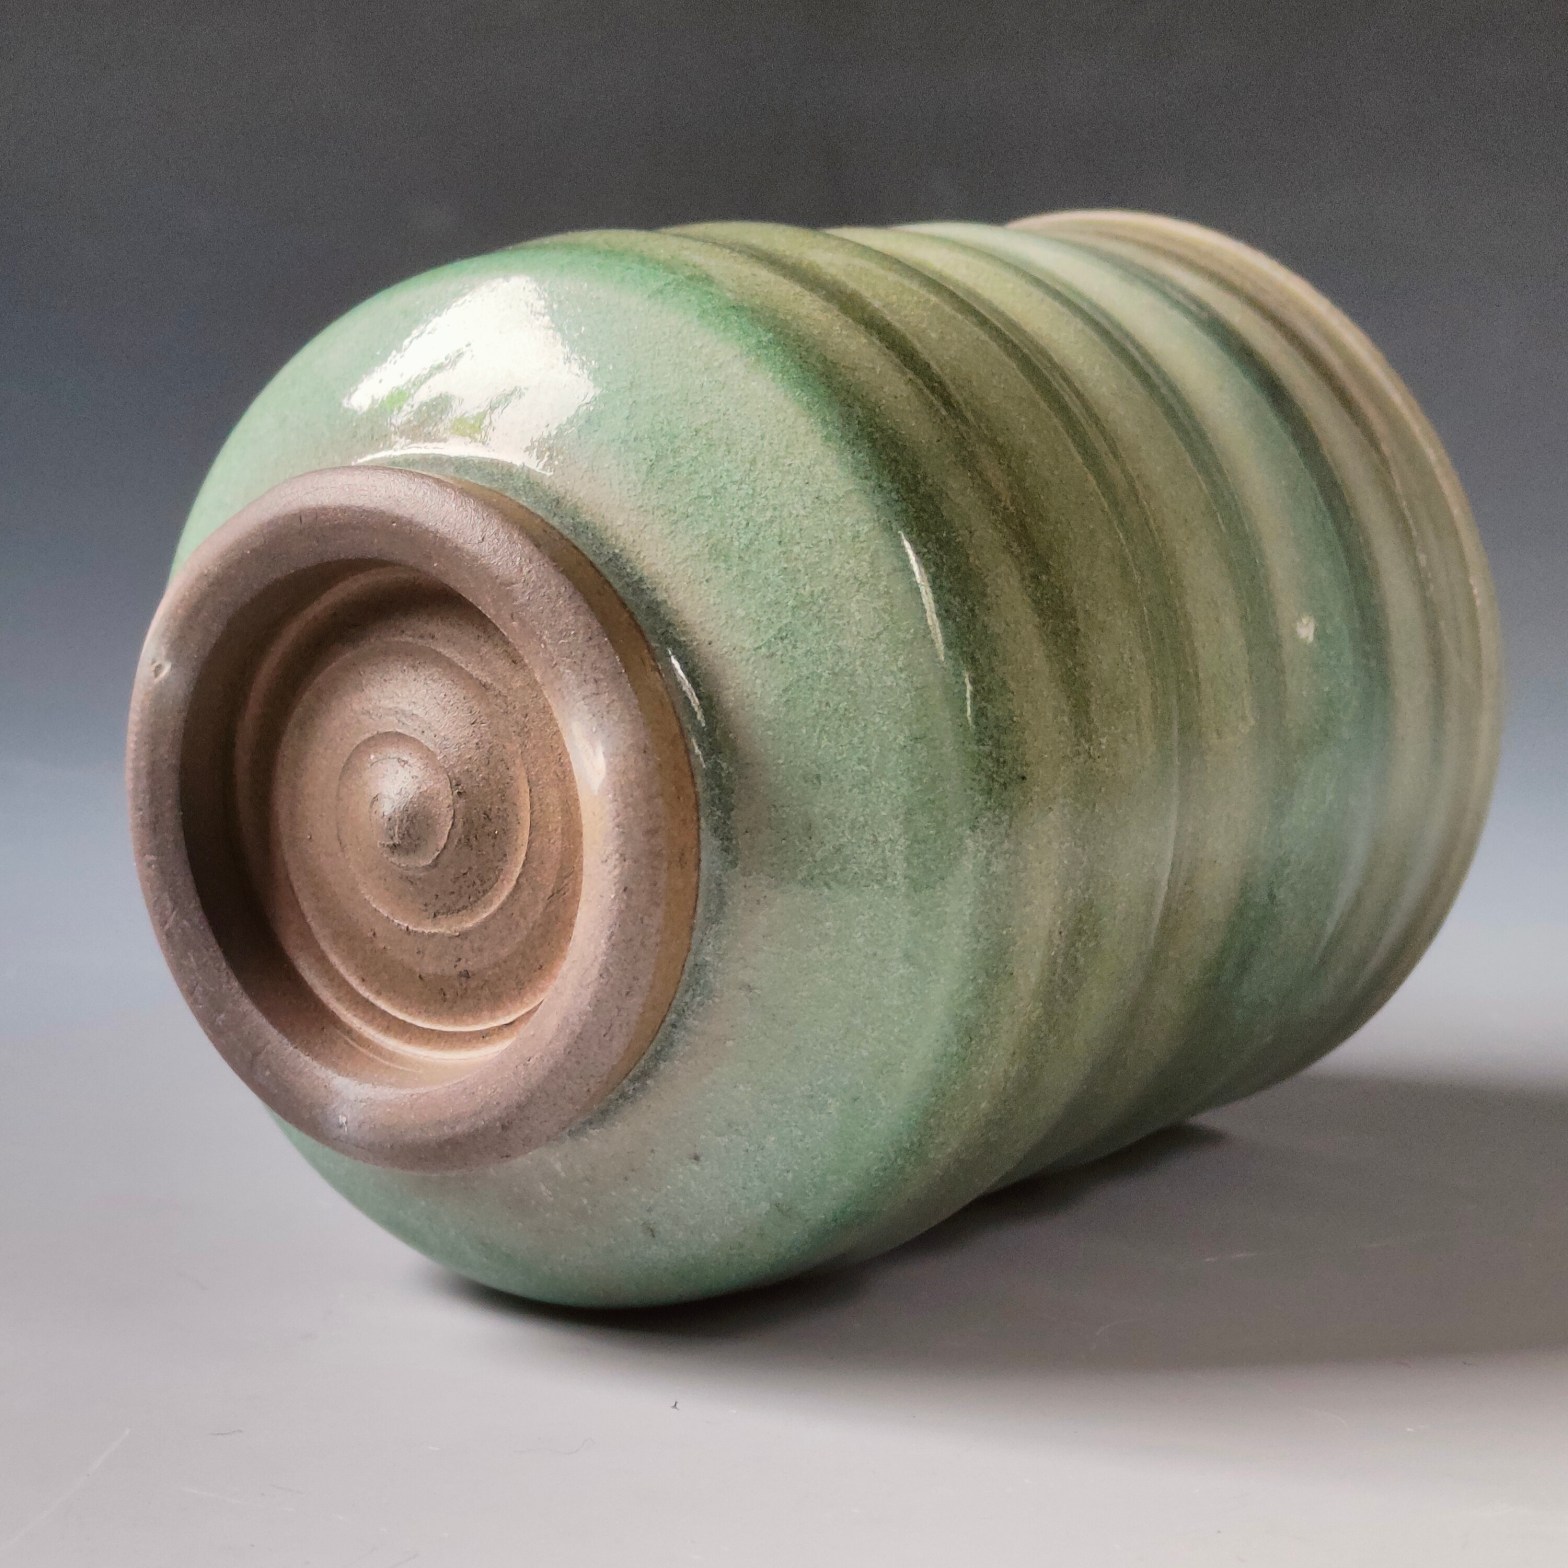
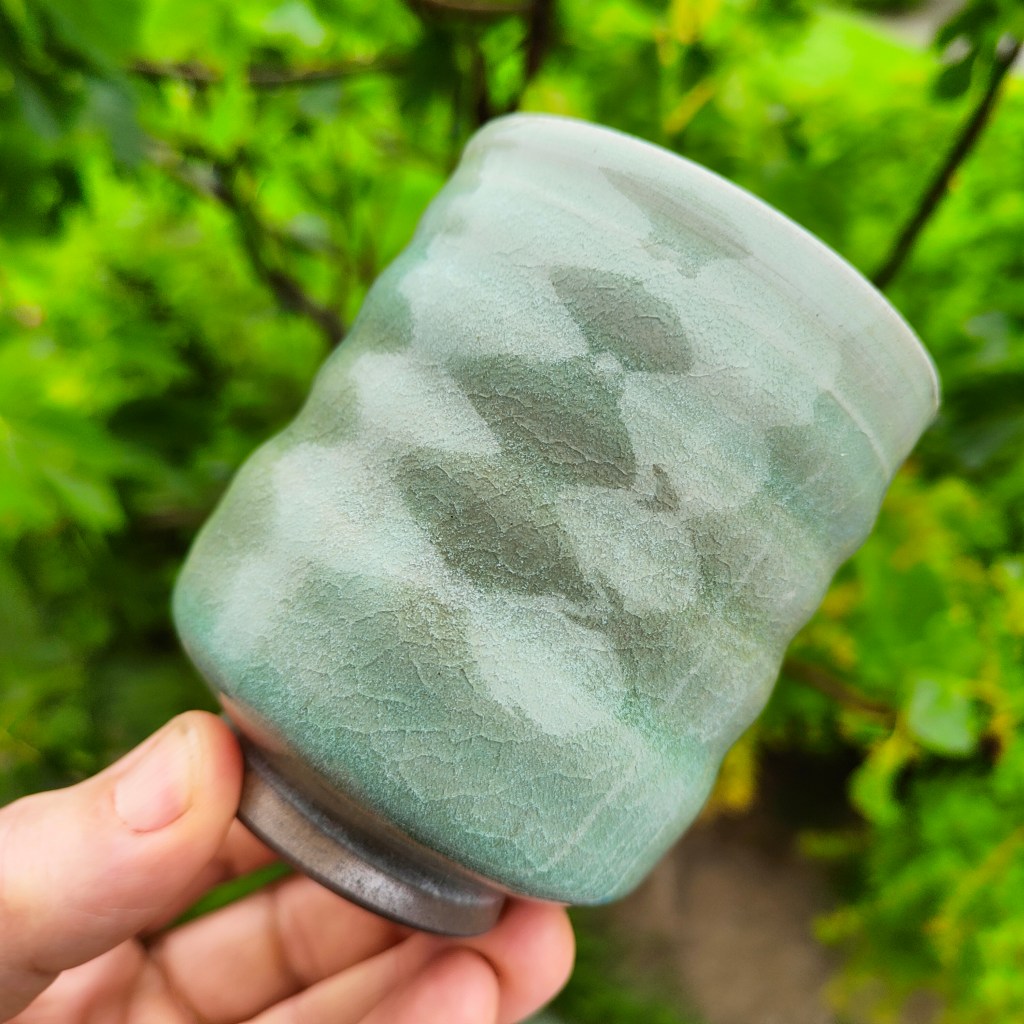
For the third and most recent attempt, I did two saggars, each with a cup glazed with the same Selsor chun. This time I made sure to get a good thickness of glaze. Both came out really nicely, though not looking how I expected Selsor chun to look (a shimmering blue chun). One came out a lovely darker green with no obvious crazing, the other came out a crazed and lighter green with a hint of blue in places.
Both were on an ochre-coloured iron clay and I am not sure why I got different results from the same glaze. Maybe it was down to one having more charcoal in the saggar, or in fact they were different clays and I didn’t check… Overall, I suspect it is the amount of charcoal, and carbon released, getting trapped by the glaze.
To summarise what I think are key things to take into account: use a low-iron or white clay, seal the lid well, don’t add too much charcoal thinking more must be better (try and gauge a moderate amount for the size of saggar). I am wondering if it might be worth weighing the amount of charcoal for a given size of saggar, so as to achieve consistent results.
An idea that has just occurred to me is, could putting larger chunks of charcoal delay most of the burning till a higher temperature? I tend to make the pieces quite small (hence producing a larger surface area). Later reduction could reduce carbon trapping and lower the risks of black coring on iron clays. That’s one for the next test…
I plan to try some other glazes: tenmoku, copper red and wood ash etc. Putting one or two per electric firing. Though now the weather is warming up here in Croatia, I will next be firing to cone 9-10 in my gas kiln. So the saggars may be a little while coming – think December 🙂 I will do another post when I have some useful results.
I hope you have found this info of interest. Remember, there is a risk to your kiln’s health if you fill it with reduction gases. With this post, I’m showing what I have done with saggars, but not saying you should do it.
